INSTRUMENTS > FAQ > SEPERATE CHANNELS AND TURNING ON SCALE DISPLAY ON GL7000
SEPERATE CHANNELS AND TURNING ON SCALE DISPLAY ON GL7000
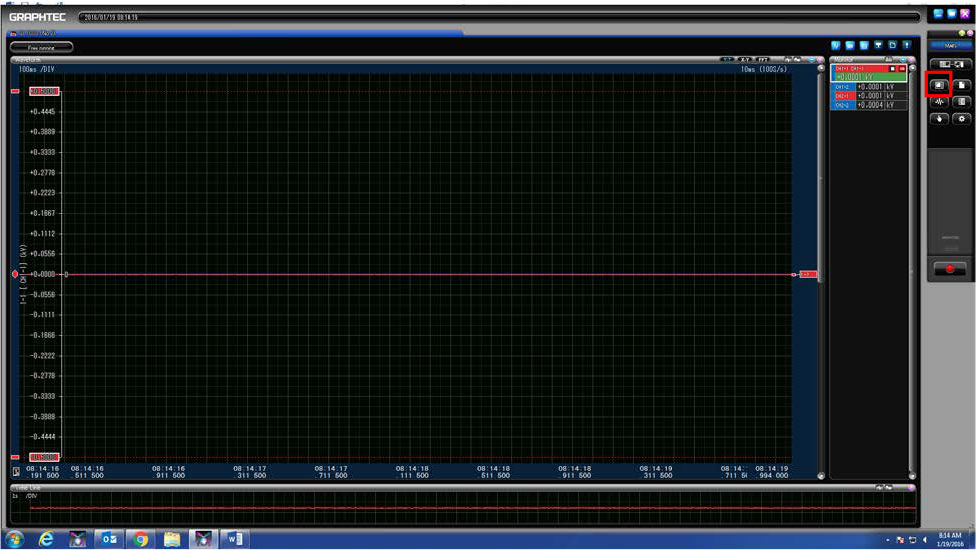
Step 1: Open your GL Connection Software and connect you GL7000 to computer either using USB or LAN cable. Once you see the connection line connecting the GL to the computer you can then press the switch screen button, highlighted in red.
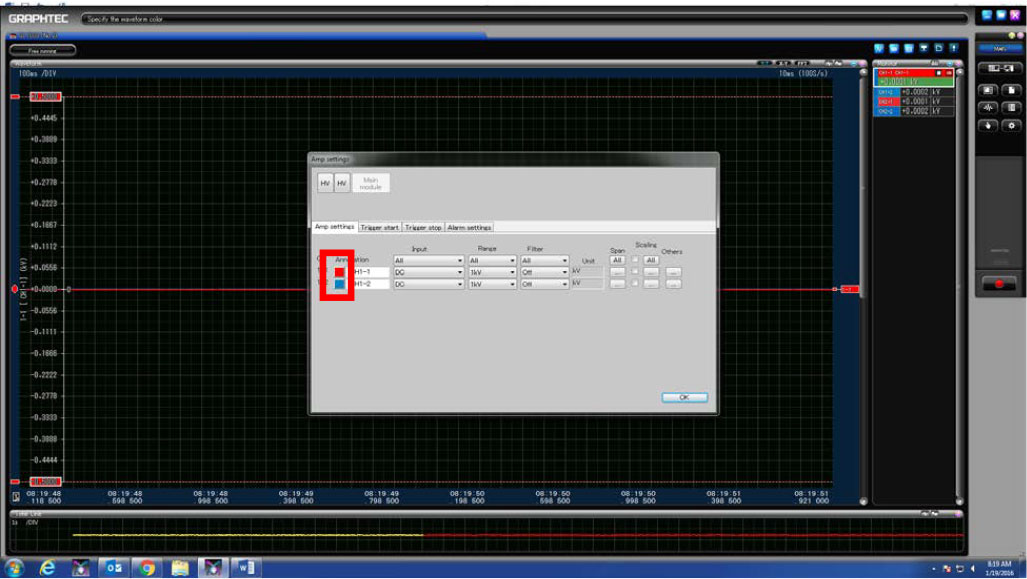
Step 2: From this screen, it would be best to first chose the color of the waveforms you want to be displayed so that you can easily distinguish between which wave is which. Now click on the condition button (highlighted in red) so that you can change the colors.
Step 3: From this screen choose the modules you would like to change the color of the waveforms on. They will be located within the red box highlighted above.
Step 4: Once you have chosen a module to adjust, you will be able to change the color of the channel by clicking on the colored boxes which are highlighted in red.
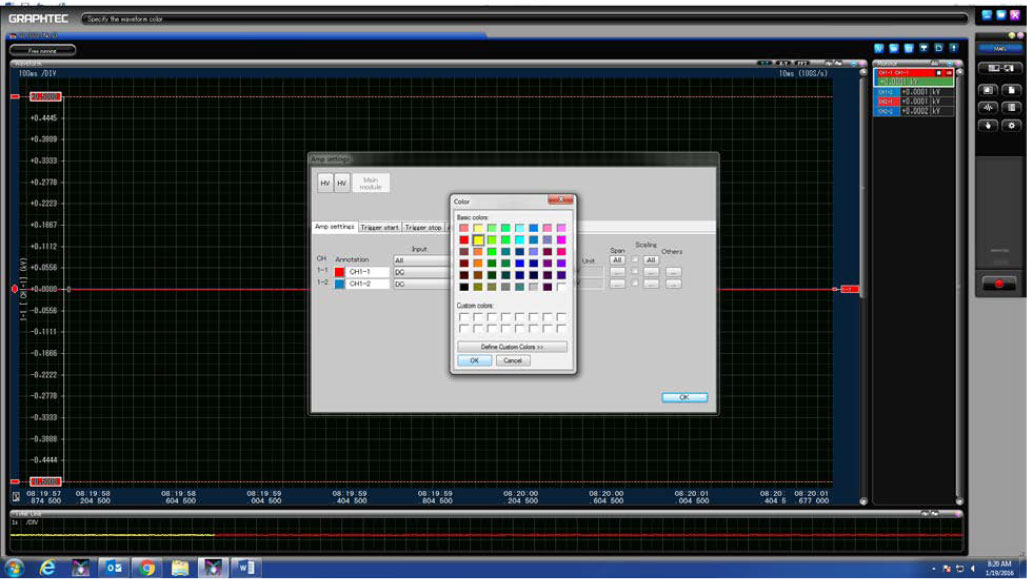
Step 5: You can now choose which color you would like to set the wave too with the color box that has popped up. After you have chosen you color for you channels, you can save and exit out of the conditions menu.
Step 6: When back on the main screen, you can right click on the chart, click on the “sort mode: and then click on the “average of display range”. This will help divide you channels.
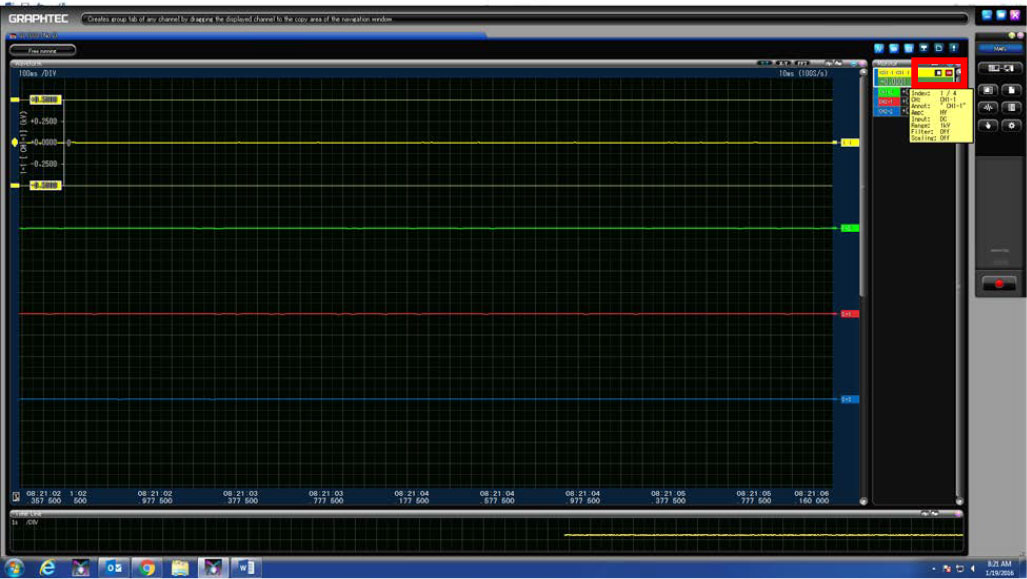
Step 7: After you have the waveforms split, only one wave form will display the range on it and too change this you must turn on this setting. To turn on the channels click on the scale display on EACH channel (highlighted in red). Ex: shown in both picture below
Step 8: Once the scale display is turned on, on each channel, you will get a scale that appears for each channel. You can now monitor each channel all at once instead of seeing the values 1 by one.
INSTRUMENTS > FAQ > SEPERATE CHANNELS AND TURNING ON SCALE DISPLAY ON GL7000


