INSTRUMENTS > FAQ > SAVING GRAPHICAL DISPLAY FROM DAILY REPORT
SAVING GRAPHICAL DISPLAY FROM DAILY REPORT
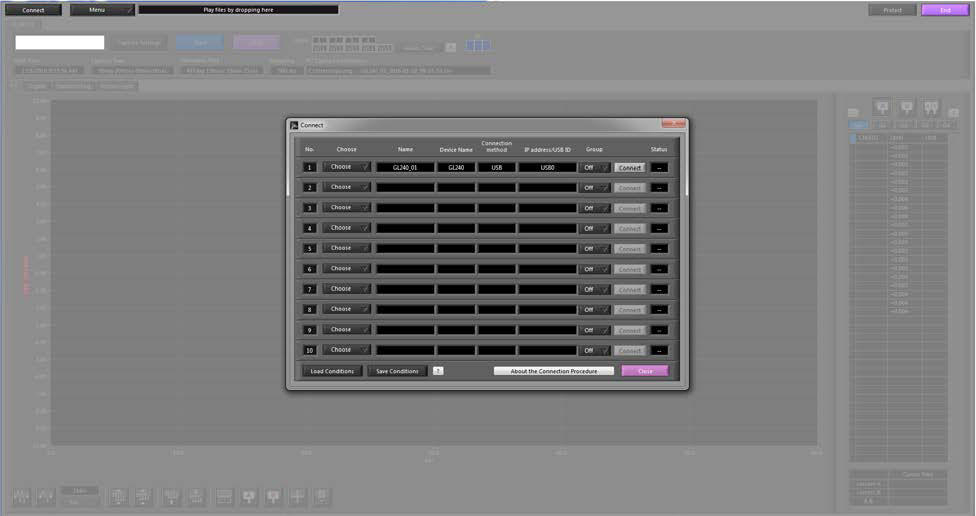
Step 1: Open up the APS software and connect your device. Make sure that the GL number and the port ID match up to that of your GLXXX unit.
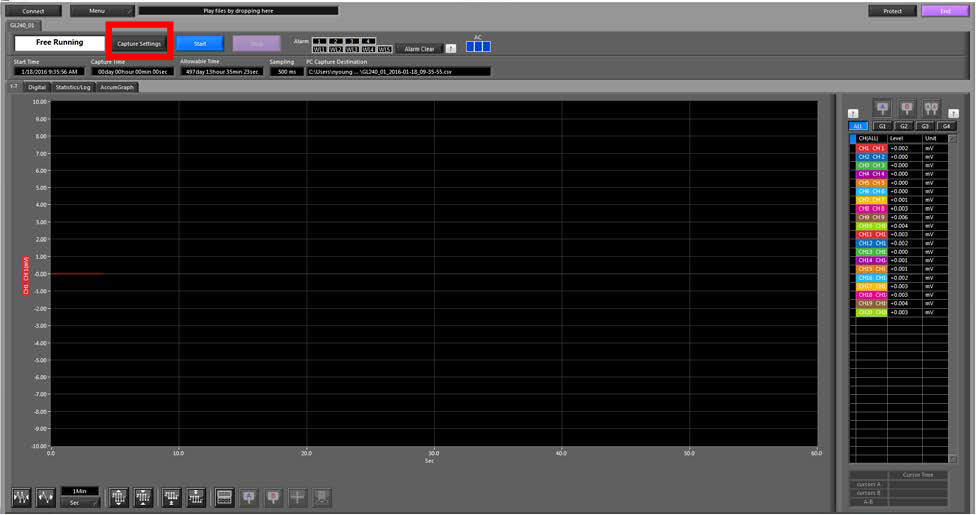
Step 2: Click on the capture setting option which is highlighted with a red box.
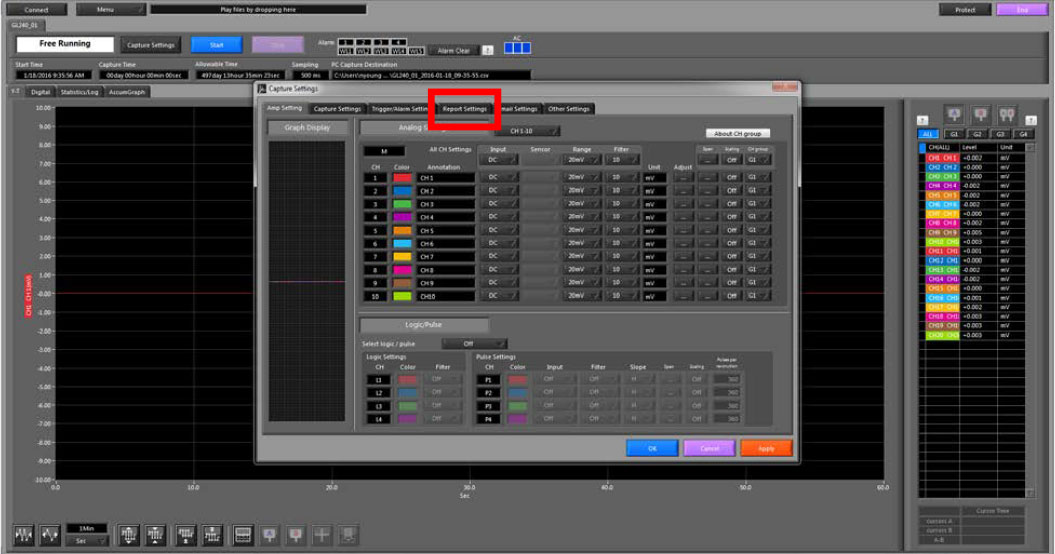
Step 3: When the new menu opens, move over to the Report Settings tab.
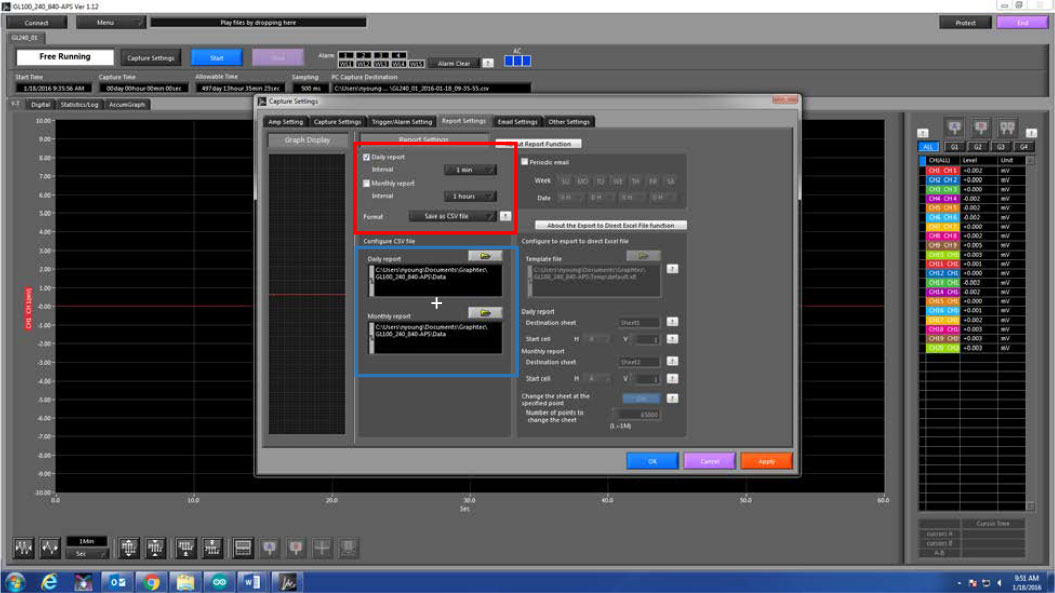
Step 4: On the report settings tab, highlighted in red is the options to choose if you want to do a daily report or a monthly report. After selecting one of those options, you will choose which interval you want the report to save in. Highlighted in blue is the option on where to save your daily or monthly report. When your settings are set, make sure to apply before pressing okay. You can now start you saving of your report and when the day is done. You can go back and get a graphical display as shown in the next steps.
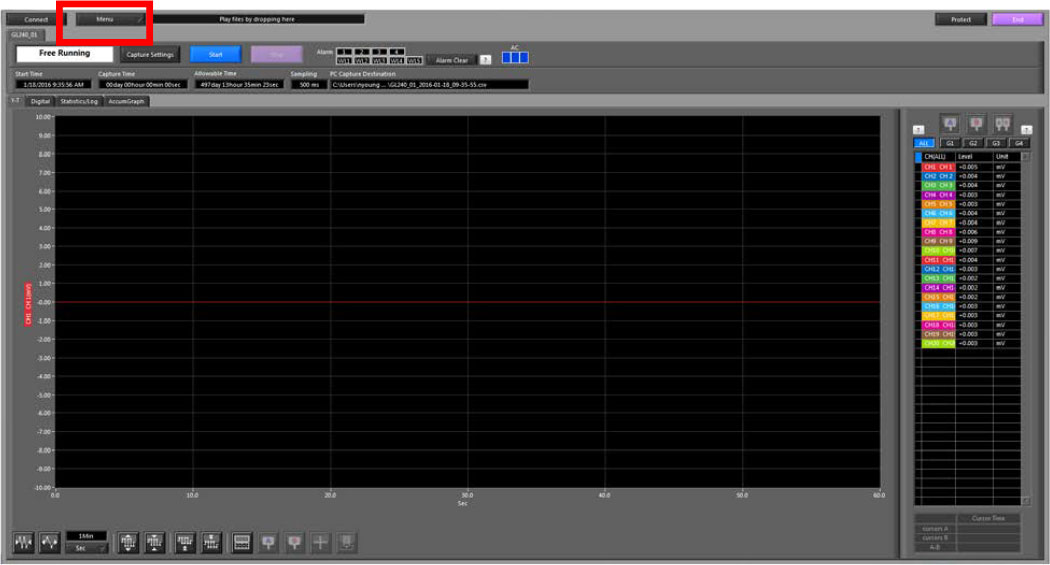
Step 5: After you have the file saved with the setting you have put in place, you will now go to the MENU options which is highlighted in red. From the options that drop down, choose the open file option.
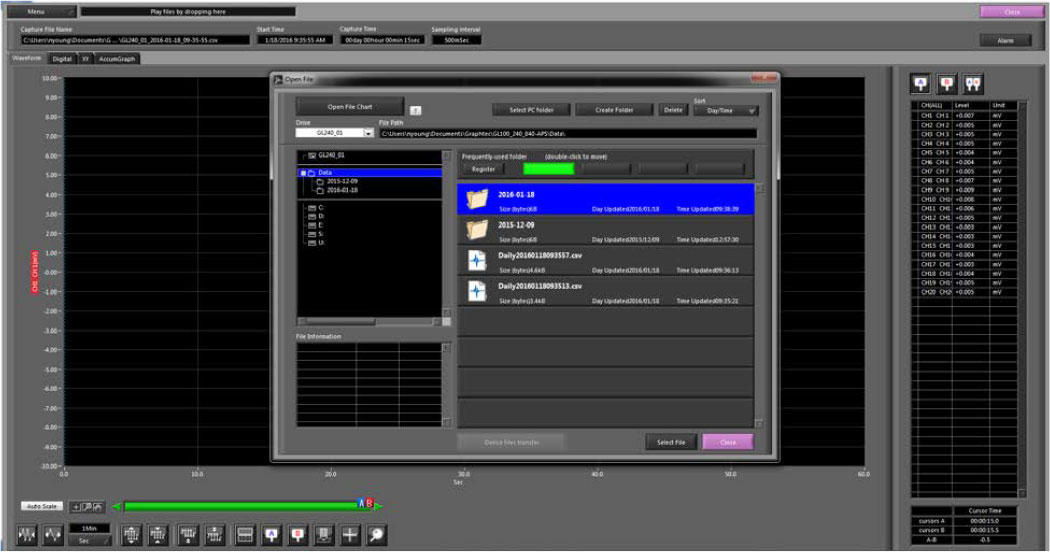
Step 6: Select the file that you saved for the day you wish to print out a graphical report on. Once selected open the file.
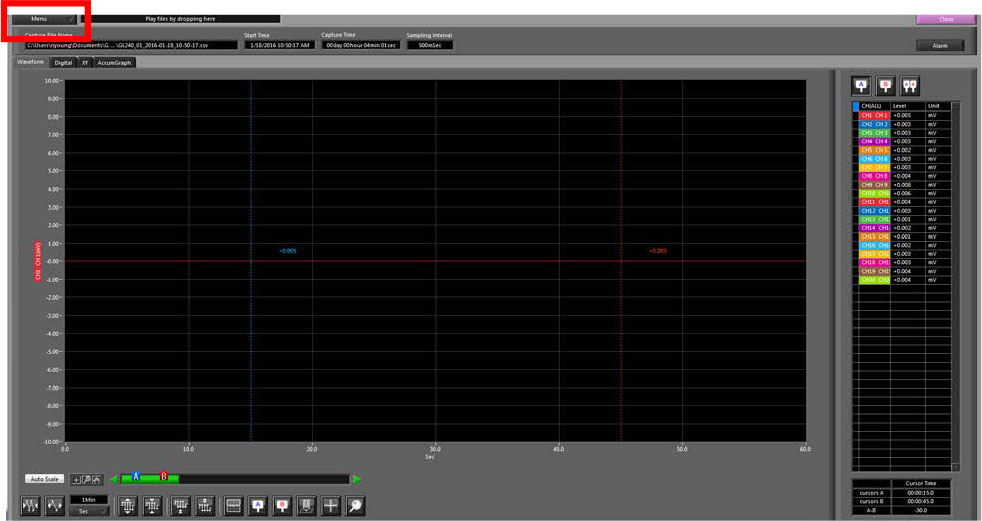
Step 7: The file you selected will open up in a different window, once this window comes up, choose the MENU option highlighted in red. Choose the print screen options from this menu.
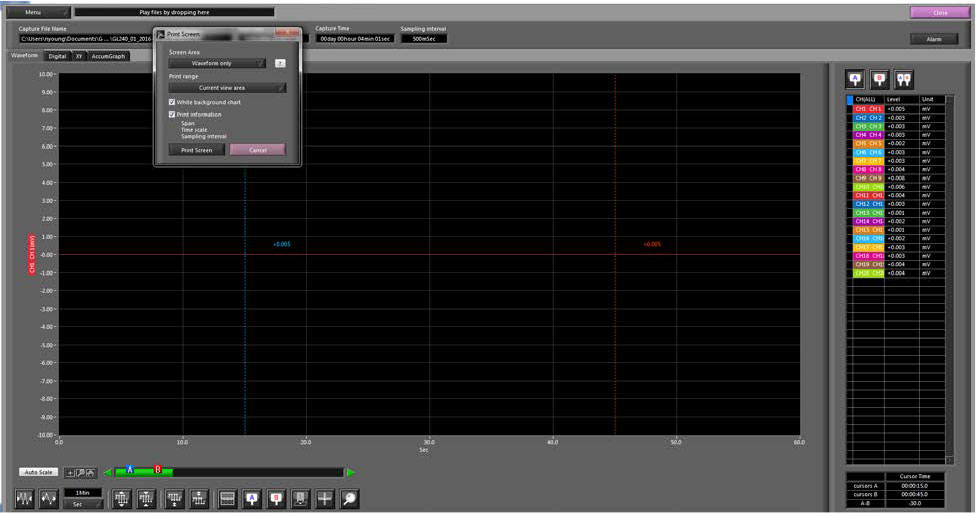
Step 8: From this Menu you can print the waveform from the file that you have selected. You have a couple of options on this menu and these options will be based off preference. Once selected, you can press print screen and you will have a graphical display of the waveform.
INSTRUMENTS > FAQ > SAVING GRAPHICAL DISPLAY FROM DAILY REPORT

