INSTRUMENTS > FAQ > REMOTE CONNECT TO MONITOR / CONTROL GL FROM WITHIN NETWORK
REMOTE CONNECT TO MONITOR / CONTROL GL FROM WITHIN NETWORK
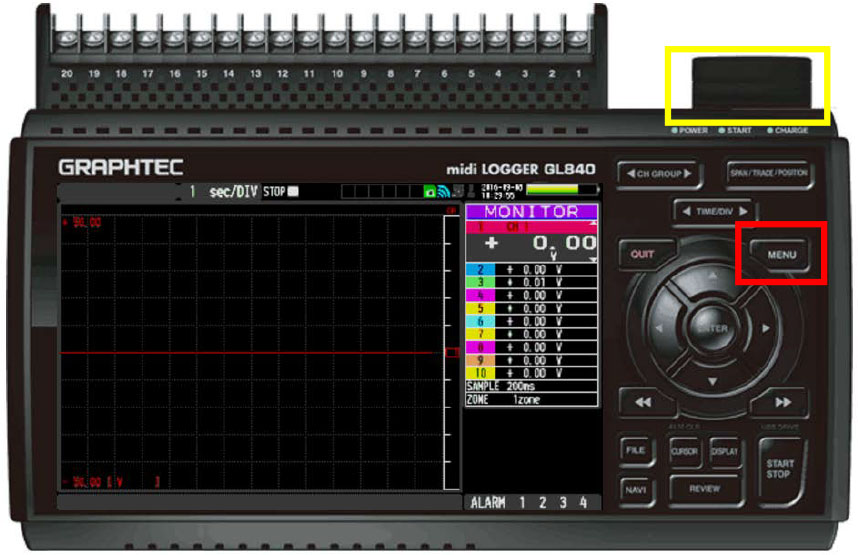
Step 1: Hit Menu.
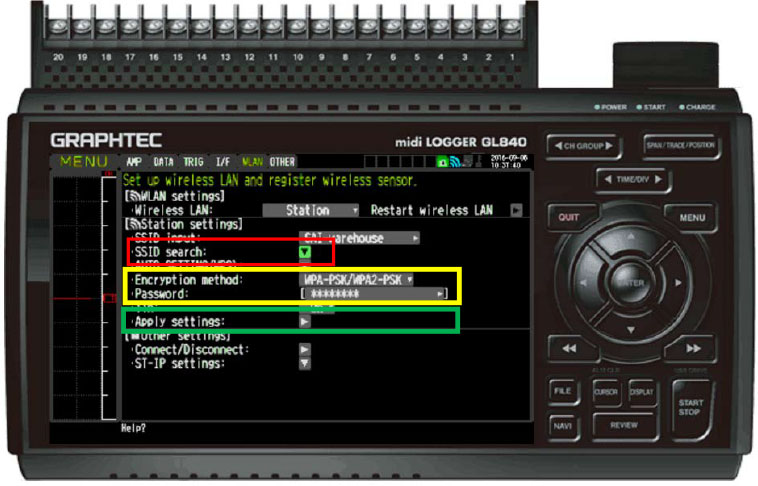
***Make sure you have Wireless Module Attached. (highlighted in yellow)
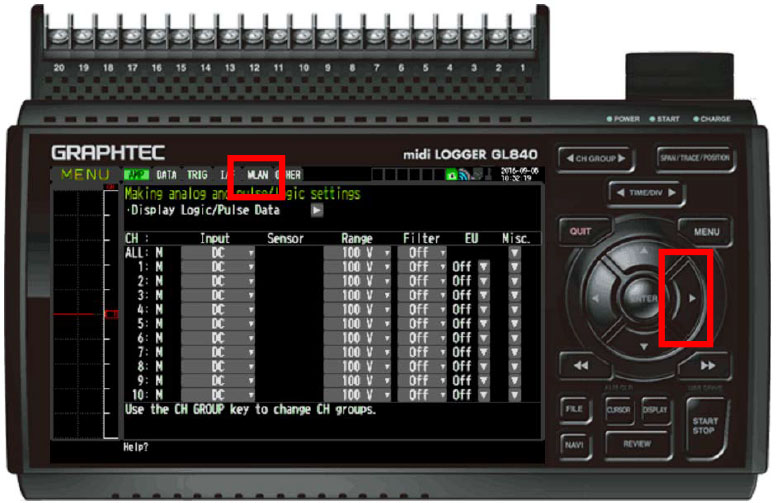
Step 2: Use arrow Key to go to WLAN
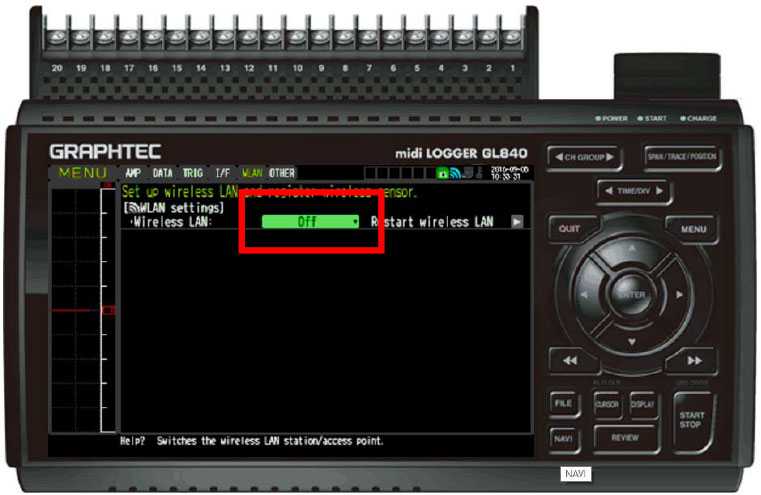
Step 3: Click on highlighted green box to get drop down Menu
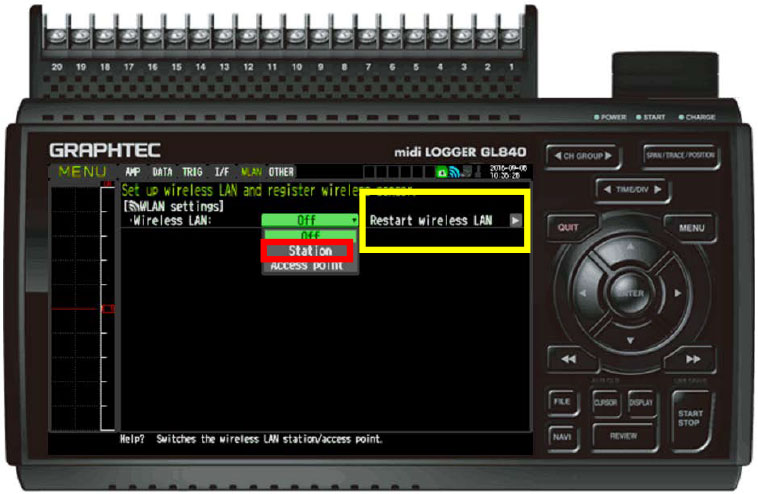
Step 4: Select station and hit okay. Then hit the Enter button on the Restart the wireless LAN(highlighted in Yellow) and wait for it to restart.
Step 5: Select SSID search and select your router (Highlighted in red). IF password protected, then choose the Encryption method and enter the password (highlighted in Yellow). After this information is entered hit the apply settings button(highlighted in Green).
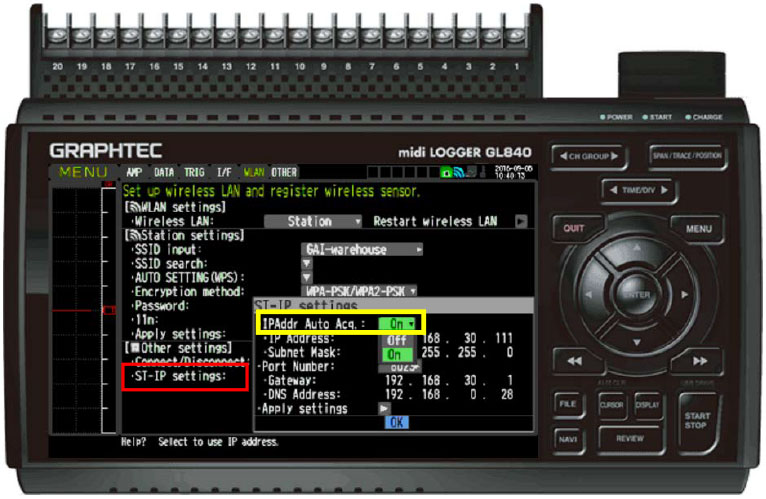
Step 6: Now go down to the Bottom Option, ST-IP settings (highlighted in Red) and select It so you get the same menu as shown above. Select the first option which is IPAddr Auto Acq and switch it to on(highlighted in yellow). Then Apply Settings at the bottom of the menu and this will change you IP settings as well as connecting it to your network.
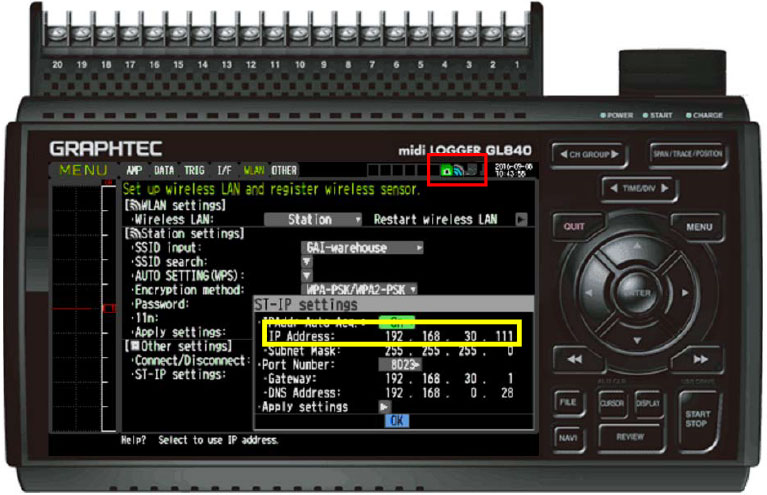
Step 7: You can tell that you’re connected by the Wireless symbol on the top becoming blue as the one highlighted in red above.
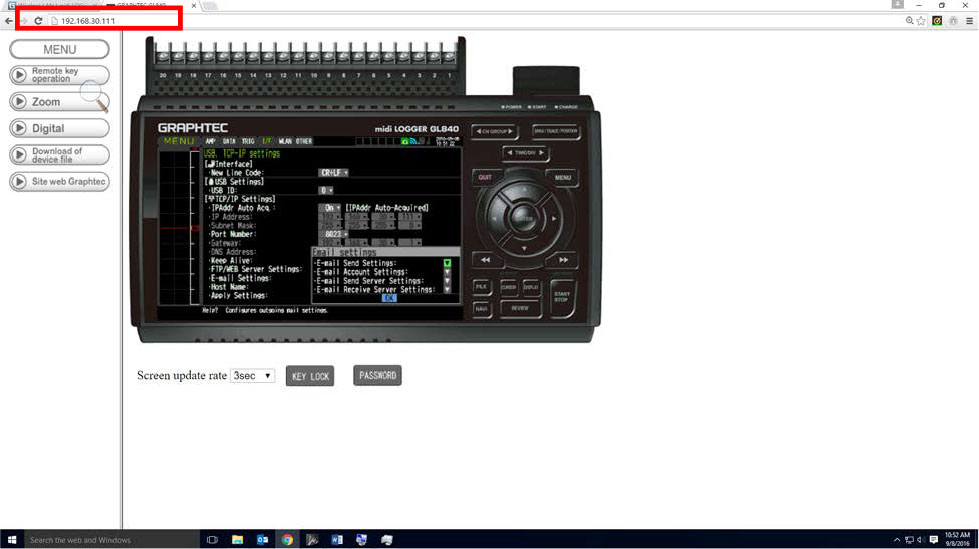
Now to remote monitor this, you will need to be within in the network in order to get a full view of the device, such as the one I have above. If you want to go outside your network you will need to set up triggers that can be sent via email to notify you.
So for remote monitoring in the network, you will use the IP address that is given after you apply the settings above. For example the one above after turning on the IPAddr Auto Acq is 192.168.30.111 (highlighted in yellow).
Step 8: Enter you IP address into your internet browser and you will be able to see the same as pictured above. This can be done with most devices that have internet access.

