INSTALLING CUTTING MASTER 4
FOR WINDOWS
After Cutting Master 4 installation is complete, perform the users registration to "SAI Cloud Connect". Follow these steps:
STEP 1:
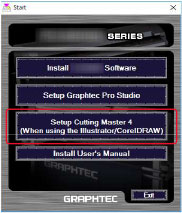
Download Cutting Master 4. Click [Setup Cutting Master 4] button from "Start" screen. Install it in accordance with the wizard from here. The following procedure has been described selectively.
Note: when downloaded from our website, double-click on the "Outrun.exe".
STEP 2:
Click on the [Browse] button when you want to change the destination folder. Click on the [Next] button.
STEP 3:
Leave the initial values for the check boxes. Click on the [Next] button.
STEP 4:
Click on the [Install] button.
STEP 5:
When the following screen is displayed, click on [Yes] button.
STEP 6:
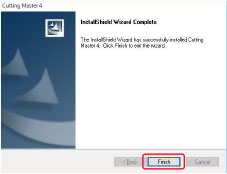
Click on the [Finish] button.
STEP 7:
Restart the computer. Now, the installation of Cutting Master 4 is complete. Continuously, perform the user registration on "SAi Cloud Connect".
FOR MAC
After Cutting Master 4 installation is complete, perform the users registration to "SAI Cloud Connect". Follow these steps:
STEP 1:
Insert DVD, or download Cutting Master 4. Double click on [Cutting Master 4_signed.pkg] file. Install it in accordance with the wizard from here.
Note: when downloaded from our website, double-click on Cutting Master 4_signed.pkg.
STEP 2:
The following screen may be displayed. Click on the [OK] button.
STEP 3:
Click on the [Continue] button.
STEP 4:
Enter the "User Name" with the administrative right and "Password" and then click on the [Install Software] button.
STEP 5:
Enter the "User Name" with the administrative right and "Password" and then click on the [OK] button.
STEP 6:
When the following screen is displayed, click [Yes] button.
STEP 7:
Click on [Close] button.
STEP 8:
Restart the computer. Now, the installation of Cutting Master 4 is complete. Continuously, perform the user registration on "SAi Cloud Connect".
CUTTING PLOTTER > SUPPORT > FAQ, VIDEO, AND HOW-TO > HOW TO INSTALL CUTTING MASTER 4


